Behind the scenes "Merry X'mas 2004"
中文→「2004耶誕賀卡」幕後花絮
Creating tools and environment:
• Hardware: Apple iMac G4/1.25GHz, 20” display; JVC GR-DX300U DV Camcorder with still camera feature.
• Software: Apple iPhoto 4; Adobe Photoshop CS
• Shooting Place: Villa Cosmos, Yangmei, Taoyuan, Taiwan
0. Shooting Object: Poinsettia (Theme for X’mas).
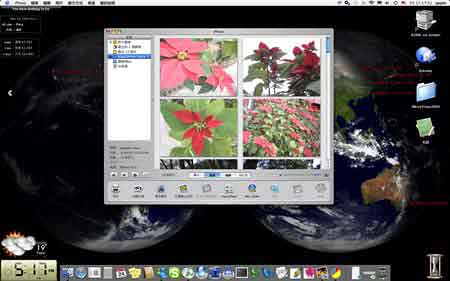
1. Import photos to iPhoto.

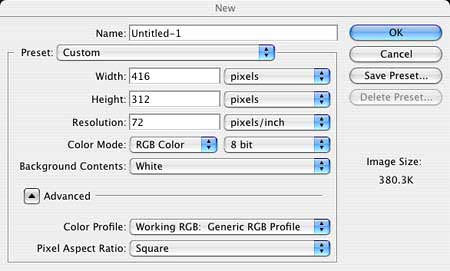
2. New blank document: 416 x 312 pixels, the standard size for iCard, RGB mode in Photoshop.

3. Open the background image (medium shot). Resize to it to be able to fit. Drag it to the new document. Set opacity to 15%.

4. Open the main object image (close-up). Use magic wand tool to select and clear its background. Drag to the new document. Arrange position to left (our eyes intend to see things from left to right). Rotate it for 180 degree. Flip the step 3 background image layer(to make two poinsettias easier to be recognized).

5. Open the deco object image (underneath shot). Crop the left one with more recognizable form. Resize. Drag to the new document.

6. Duplicate the deco object layers until filling the four-side edge of new document to create a frame. Rotate the object if needed. Apply them the drop shadow effect to create the visual depth.

7. Duplicate the main object layer. Use pen tool to draw the outline of the red leaf. Select the outlined area. Invert the selection. Clear the selection. Apply drop shadow effect on this leaf. Make sure it is over the deco frame layers. Do the same process on the bottom two red leaves.

8. Use type tool to type the texts while altering their colors to create variation. Arrange the type with a suitable composition.

9. The above steps are the processes for creating the image of the card. After that, I uploaded it on my pictures folder inside iDisk, provided by Apple’s .mac online service. Afterwards, just get online to the iCard page inside .mac service. Follow the onscreen instructions to make it an e-card and send it to friends.

Creating tools and environment:
• Hardware: Apple iMac G4/1.25GHz, 20” display; JVC GR-DX300U DV Camcorder with still camera feature.
• Software: Apple iPhoto 4; Adobe Photoshop CS
• Shooting Place: Villa Cosmos, Yangmei, Taoyuan, Taiwan
0. Shooting Object: Poinsettia (Theme for X’mas).
1. Import photos to iPhoto.

2. New blank document: 416 x 312 pixels, the standard size for iCard, RGB mode in Photoshop.

3. Open the background image (medium shot). Resize to it to be able to fit. Drag it to the new document. Set opacity to 15%.

4. Open the main object image (close-up). Use magic wand tool to select and clear its background. Drag to the new document. Arrange position to left (our eyes intend to see things from left to right). Rotate it for 180 degree. Flip the step 3 background image layer(to make two poinsettias easier to be recognized).

5. Open the deco object image (underneath shot). Crop the left one with more recognizable form. Resize. Drag to the new document.

6. Duplicate the deco object layers until filling the four-side edge of new document to create a frame. Rotate the object if needed. Apply them the drop shadow effect to create the visual depth.

7. Duplicate the main object layer. Use pen tool to draw the outline of the red leaf. Select the outlined area. Invert the selection. Clear the selection. Apply drop shadow effect on this leaf. Make sure it is over the deco frame layers. Do the same process on the bottom two red leaves.

8. Use type tool to type the texts while altering their colors to create variation. Arrange the type with a suitable composition.

9. The above steps are the processes for creating the image of the card. After that, I uploaded it on my pictures folder inside iDisk, provided by Apple’s .mac online service. Afterwards, just get online to the iCard page inside .mac service. Follow the onscreen instructions to make it an e-card and send it to friends.

Labels: Tutorial


0 Comments:
Post a Comment
<< Home